1. Include the SDK
You have to add this maven URL ‘https://gitlab.com/gamooga-android/gamooga-sdk/raw/repository/’. Into project level build.gradle file Include this URL like below:
allprojects {
    repositories {
        jcenter()
        maven {
            // add this line for gamooga repo, the above lines may already be there
            url 'https://gitlab.com/gamooga-android/gamooga-sdk/raw/repository/'
        }
    }
}
In case you are updating the existing Gamooga SDK version to 2.0.5 and onwards, the value for the key “GAMOOGA_PUSH_CHANNEL_ID” in the metadata has to be changed to “gamooga_push_id” link
The latest addition to the SDK version 2.1.0 and onwards allows the application to send push notification with a custom ringtone. To configure this, the developer is required to add the ringtone files (.mp3 files) to the “raw” folder. In order to utilize the ringtone for a particular push notification, the file name is required to be added to the touchpoint in the field “Custom Tone”. It is to be added without the extension( for example: if the file tone1.mp3 is added to the raw folder, while setting up the push notification template, the value for the “Custom Tone” field should be tone1 ).
A maximum of 25 ringtone channels will be maintained for the application and the least recently used ringtones will be removed on receival of a notification.
You should also add “com.gamooga.targetact:gamooga-targetact-client:2.1.4” as a dependency in app/build.gradle since its required for Gamooga SDK. You will need to add a dependency like below, only if it’s not already added:
implementation 'com.gamooga.targetact:gamooga-targetact-client:2.1.4'
To add PushAmplify support, the following dependeny should be added in app/build.gradle.
implementation 'com.firebase:firebase-jobdispatcher:0.8.6'
If you are using Gamooga’s FCM services the following dependency should be added in app/build.gradle.
implementation 'com.google.firebase:firebase-core:16.0.4'
implementation 'com.google.firebase:firebase-messaging:17.3.4'
2. Update AndroidManifest.xml
2.1. Permissions
The following permissions are required for our SDK. Add them if not already added into your AndroidManifest.xml:
<uses-permission android:name="android.permission.WAKE_LOCK" />
<uses-permission android:name="android.permission.INTERNET" />
<uses-permission android:name="android.permission.ACCESS_NETWORK_STATE" />
2.2. Gamooga configuration
Add your Gamooga Company ID as a metadata into AndroidManifest.xml like below:
<meta-data android:name="GAMOOGA_COMPANY_ID" android:value="<your company id>" />
Please refer to section Get Gamooga Company Id to retrieve the Company ID. Replace the <your company id> with the Company Id.
Additionally if PushAmplify functionality is also subscribed to, the following should be included:
<meta-data android:name="PUSHAMPLIFY_APIKEY" android:value="<your key goes here>" />
PushAmplify API Key can be obtained from the Gamooga Panel under Push Settings after logging in using the credentials provided.
You can configure the PushAmplify call frequency by adding the following. The default value set for call frequency is 30.
<meta-data android:name="PUSHAMPLIFY_INTERVAL_MINS" android:value="30" />
2.3. Configuring the FCM Server Key & google-services.json file
- Add google-services.json file in your projects app/ directory.
- Configure the FCM Server Key in Gamooga Admin Panel.
Refer to section Get Firebase Server Key and Configuration file to understand how to retrieve the Server key & configuration fie from your Firebase project.
2.4. Push configuration
Add the following to your AndroidManifest.xml for Gamooga to handle push notifications:
2.4.1 FCM Services configuration
In case you already have configured the FCM services previously, do not add the GamoogaInstanceIDListenerService and GamoogaFCMListener services in the manifest.
<service
    android:name="com.gamooga.targetact.client.fcmpush.GamoogaInstanceIDListenerService">
        <intent-filter>
             <action android:name="com.google.firebase.INSTANCE_ID_EVENT" />
        </intent-filter>
 </service>
 <service
    android:name="com.gamooga.targetact.client.fcmpush.GamoogaFCMListener">
        <intent-filter>
            <action android:name="com.google.firebase.MESSAGING_EVENT" />
        </intent-filter>
 </service>
Below code snippet of FCM Activity shower should be added in manifest
<activity
    android:name="com.gamooga.targetact.client.GcmActivityShower"
    android:label="Loading"
    android:exported="true">
</activity>
2.4.2 Push Notification Channel(for Oreo and above)
Add these channel info to support Push Notification’s an Android Oreo and above.
<meta-data android:name="GAMOOGA_RICH_PUSH_CHANNEL_NAME" android:value="Rich Aletrs" />
<meta-data android:name="GAMOOGA_RICH_PUSH_CHANNEL_ID" android:value="gamooga_rich_push_id" />
<meta-data android:name="GAMOOGA_RICH_PUSH_CHANNEL_DESCRIPTION" android:value="Rich Aletrs description" />
<meta-data android:name="GAMOOGA_RICH_PUSH_CHANNEL_IMPORTANCE" android:value="3" />
<meta-data android:name="GAMOOGA_PUSH_CHANNEL_NAME" android:value="Aletrs" />
<meta-data android:name="GAMOOGA_PUSH_CHANNEL_ID" android:value="gamooga_push_id" />
<meta-data android:name="GAMOOGA_PUSH_CHANNEL_DESCRIPTION" android:value="Aletrs description" />
<meta-data android:name="GAMOOGA_PUSH_CHANNEL_IMPORTANCE" android:value="2" />
2.4.3 Push Notification Icons
Push Notification’s default icon, small icon, and its color can be configured in the manifest file as shown in the code snippet. The default icon, small icon and the color from the manifest values will be utilized if the icons and the color are not configured in the touchpoints. In case the icons and the color are not set in the touchpoint or the manifest file, the default FCM icons and the color “#EF0707” will be used while sending a push notification.
<meta-data android:name="GAMOOGA_DEFAULT_NOTIF_ICON" android:value="ICON NAME" />
<meta-data android:name="GAMOOGA_DEFAULT_NOTIF_SMALL_ICON" android:value="SMALL ICON NAME" />
<meta-data android:name="GAMOOGA_DEFAULT_SMALL_ICON_COLOR" android:value="\#EF0707" />
2.5. Debugging
The following is highly recommended to be part of the AndroidManifest for debugging purposes.
<meta-data android:name="GAMOOGA_MOTION_EVENT" android:value="yes" />
The following can be used to enable logs. Recommened only to be part of the Development build. Should not be part of the Production build.
<meta-data android:name="GAMOOGA_DEVEL" android:value="yes" />
<meta-data android:name="PUSHAMPLIFY_DEVEL" android:value="yes" />
3. Gamooga API
3.1. Import and initialize
Import TargetActClient in any of the activities preferably Home Activity as shown below:
import com.gamooga.targetact.client.TargetActClient
Get the singleton instance anywhere in your code like below:
TargetActClient tac = TargetActClient.getInstance();
Before any other API is called, its necessary to initialize the client like below. The call will make a few calls to our servers, initialize the internal state and make it ready to send events and receive notifications. Hence, make sure to call it in OnCreate method of the launcher activity.
Initialize it like below:
-
With activity as the argument if in-app notification functionality is required:
tac.initialize(activity); // if in-app notifications are required -
With application context as the argument (but in-app notification functionality will not be available):
tac.initialize(getApplicationContext()); // if in-app notifications are not required
3.2. Event push
Call the below method to push events to Gamooga:
tac.pushEvent(String eventName, Map eventProps);
eventName is the name of the event to be pushed and eventProps is the Map of the key-value pairs associated with the event. Any JSON-able value (string, int, float, boolean) can be added to the Map.
All event names and property names can only contain alpha-numeric characters or underscores(these should not contain any spaces). They cannot start with a number or an underscore and should be in lowercase.
3.3. Visitor property push
Call the below method to push visitor properties to Gamooga:
tac.pushProperty(String propName, Object propVal);
propName is the visitor’s property (name, email, mobile, etc) and propVal is any JSON-able value (string, int, float, boolean). The Property name can only contain alpha-numeric characters or underscores(these should not contain any spaces). It cannot start with a number or an underscore and should be in lowercase.
3.4. Visitor identify
Call the below method to identify the visitor with a unique id:
tac.identify(String uniqId);
When the app is installed a new visitor id is generated and stored in the app. When the user is identified, the visitor id is changed to user’s visitor id if he is already identified from any other device or else the current visitor id is retained.
3.5. Visitor property list add
Call the below method to create/append values to a list based visitor property:
tac.addPropertyToList(String propName, String propVal);
propName will be the list that propVal gets appended to.
3.6. Visitor property list remove
Call the below method to remove values from a list based visitor property:
tac.removePropertyFromList(String propName, String propVal);
propName will be the list from which propVal is removed if it exists in the list.
3.7. Push registration
Gamooga can do the FCM registration for you. Call the following method to initiate registration in the background:
tac.doPushRegistration();
Google recommends doing the push registration on every launch. You can also do the push registration from your end but pass on the registration token to Gamooga like below:
tac.savePushRegistrationId("<push token>");
To retrieve the push registration token, you can use the following method:
tac.getPushRegistrationId();
NOTE: To be able to send pushes using Gamooga, you need to configure the Gamooga panel with Firebase Server Key. Refer to section Get Firebase Server Key and Sender ID to understand how to retrieve the Server Key from your Firebase project.
3.8. Custom push receiver
You may be using your own push receiver to handle pushes. To delegate Gamooga pushes to the SDK, you can use the following methods.
When the application instance does not exist, TargetActClient instance needs to be initialized with a false parameter as shown in the below code.
TargetActClient.getInstance().initialize(this,false);
To check if it’s a Gamooga push, use the following method:
tac.isGamoogaPush(RemoteMessage message);
To let the SDK handle the push, use the following method:
tac.handleGamoogaPush(RemoteMessage message);
3.9. Retrieve events from the server
Gamooga can save events for high-speed retrieval by clients. The following is the API to retrieve such events:
tac.getEvents(GamoogaCallback ic, String eventName, int eventCount, long timestamp);
ic is an object implementing GamoogaCallback described below. eventName is the name of the event to retrieve the data for. eventCount is the number of events to retrieve. Events that have occurred after timestamp epoch would be returned.
Retrieving any specific event data requires it to be enabled in Gamooga backend. Please contact support@gamooga.com for the same.
GamoogaCallback needs to implemented like below:
class SomeClass implements GamoogaCallback {
    @Override
    public void onGetEvents(String result, int status) {
         // Process the result here
    }
}
status onGetEvents
Here status will be 200 for success, 500 for a record not found, -1 for an unidentified error. It can also be equal to any other HTTP response code. And result is a JSON string with the data in the format as below:
{"event_name": [
    {"prop1": "val11", "prop2": "val21", ...},
    {"prop1": "val12", "prop2": "val22", ...},
    ...
]}
3.10. Custom action callback
Gamooga has a touchpoint called custom action. Data can be sent to the device as a result of a campaign which can be custom handled by the app, for example, to render few sections of the app in a personalized manner.
Custom action callback needs to be registered like below:
tac.registerCustomActionCallback(GamoogaCallback gc);
Whenever a custom action is received by the app from Gamooga’s back end, onCustomActionReceived method of gc is called.
GamoogaCallback needs to be implemented like below:
class SomeClass implements GamoogaCallback {
    @Override
    public void onCustomActionReceived(String result) {
         // Process the result here
    }
}
Here status will be 200 for success, 500 for a record not found, -1 for an unidentified error. It can also be equal to any other HTTP response code. And result is a JSON string with the data in the format as below:
{
    "name": "<custom actio name>",
    "ca_data": "<custom action data sent from campaign side>"
}
3.11. Return Push Message
-
If Client is using Gamooga FCM services, Gamooga will send received push message to the client through callback method
Whenever a push message is received by the app from Gamooga’s back end,
onPushMessageReceivedmethod ofgcis called.GamoogaCallbackneeds to be implemented like below:class SomeClass implements GamoogaCallback { @Override public void onPushMessageReceived(RemoteMessage message) { // Process the RemoteMessage here } } -
If Client is using their own FCM services, Gamooga will bundle the push body into pending intent
Whenever a user clicks on push notification, Client can retrieve the push body as below.
getIntent().getBundleExtra("__push_body");
3.12. Cleanup
tac.cleanUp();
In the onDestroy of your App’s launcher activity, you can call the following method to cleanup TargetActClient. Currently, this method is a no-op.
4. Get Firebase Server Key and Configuration file
Follow the below steps to retrieve the sender id:
- Open the Firebase console
- If you haven’t created an API project yet, click Create Project.
- Find your Firebase project and click Project Name.
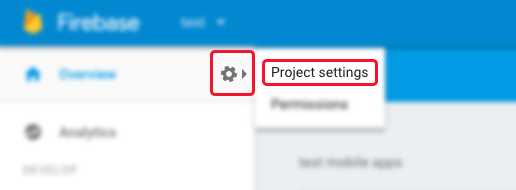
- Click the settings icon and select Project settings menu option.
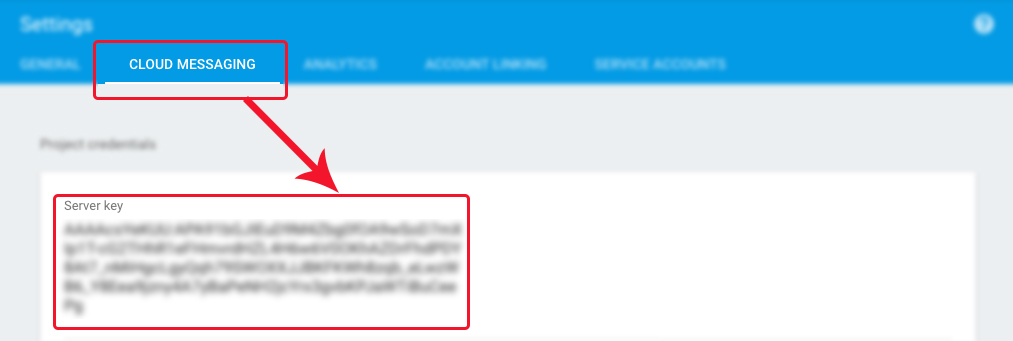
- Select Cloud Messaging tab to reveal the Server Key and configuration file.
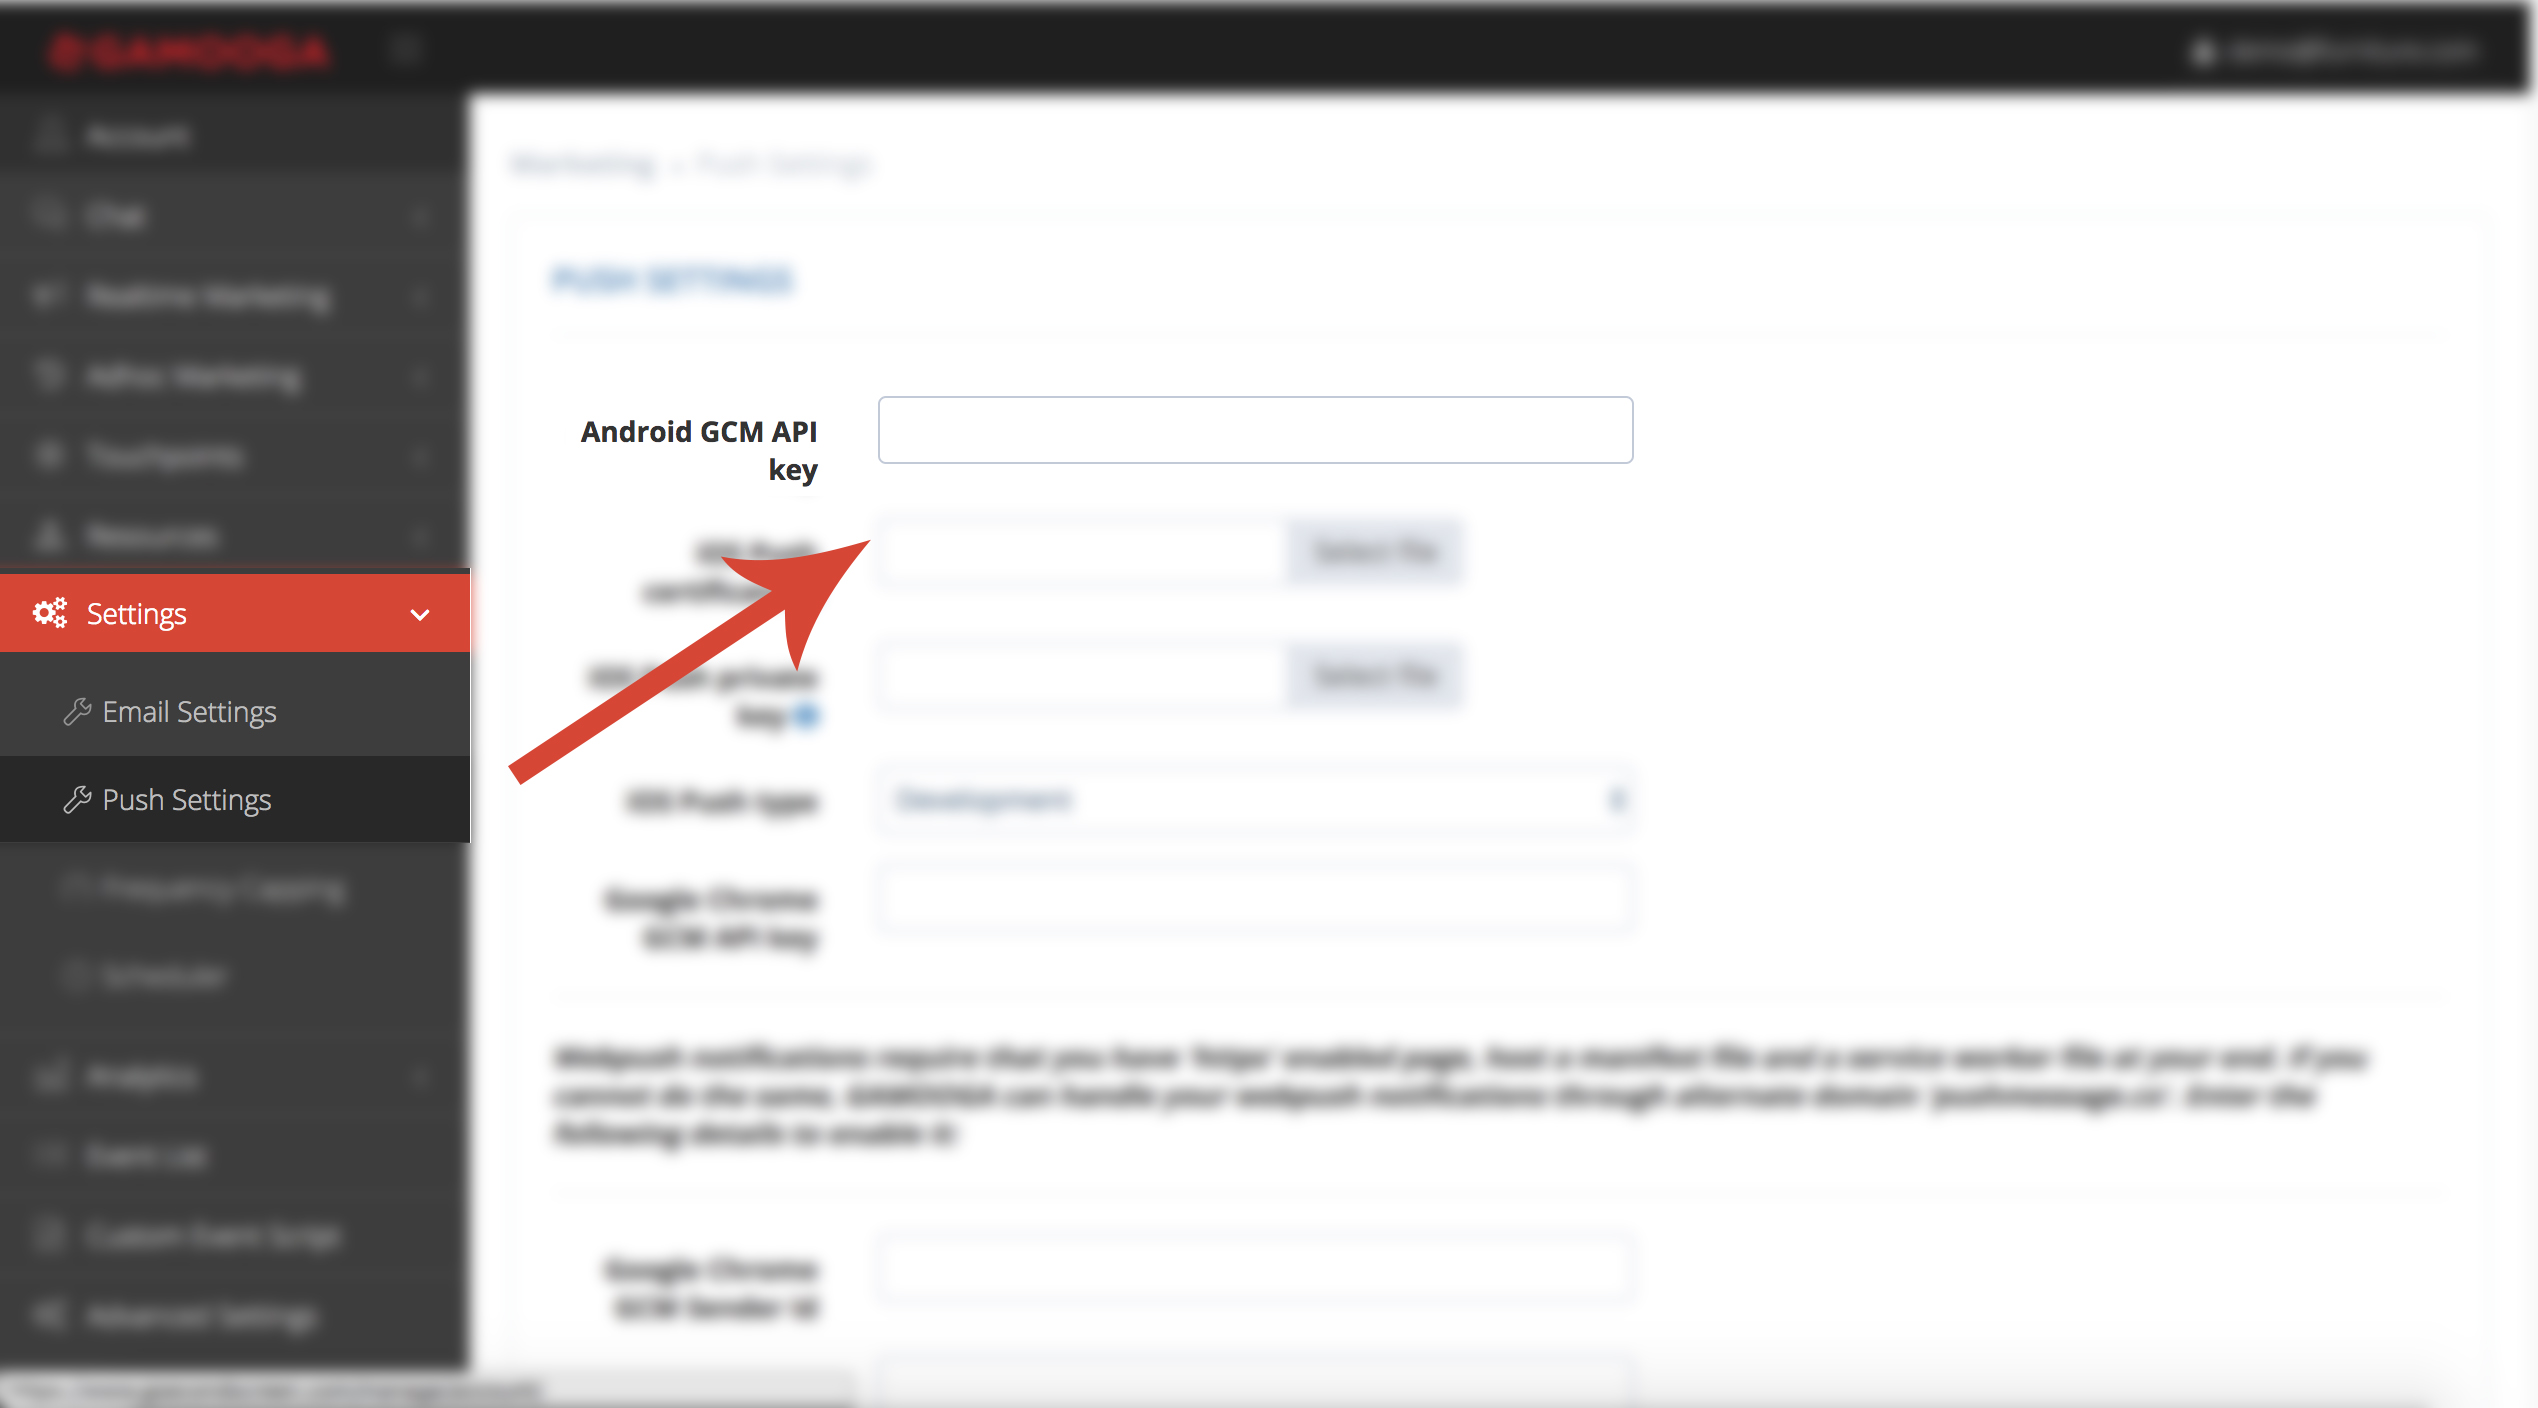
- Configure the Server Key in Gamooga Admin Panel as shown below.
Below is an image showcasing where the google-services.json file is available for download.
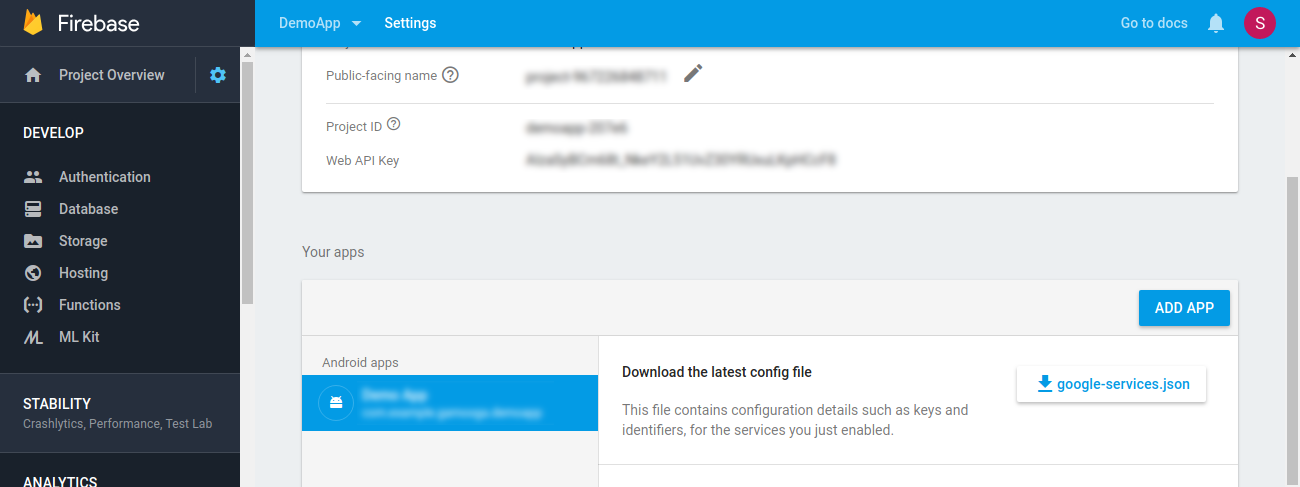
Please download the file and add it to your project under app/ directory.